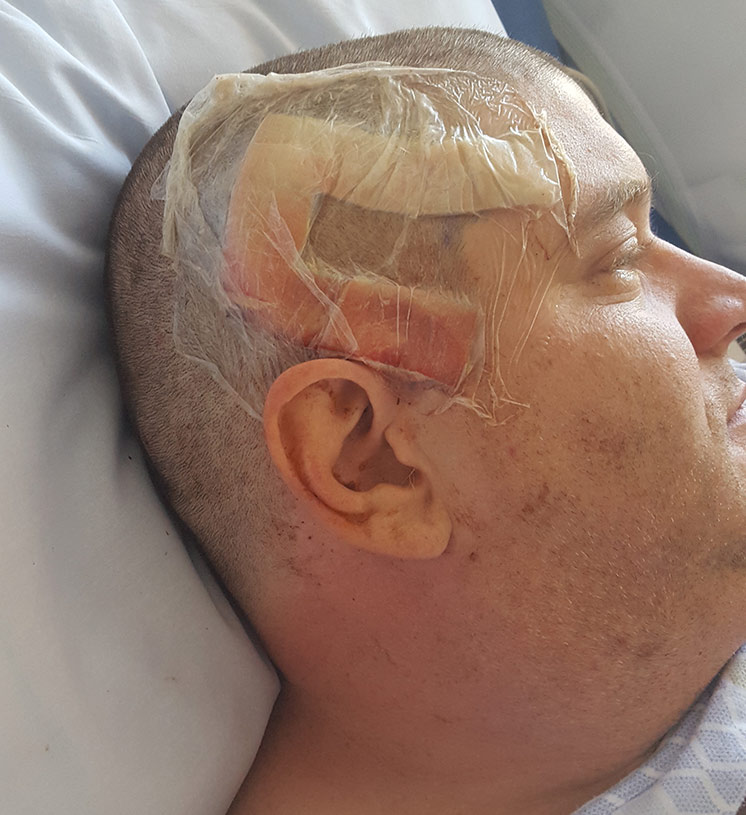
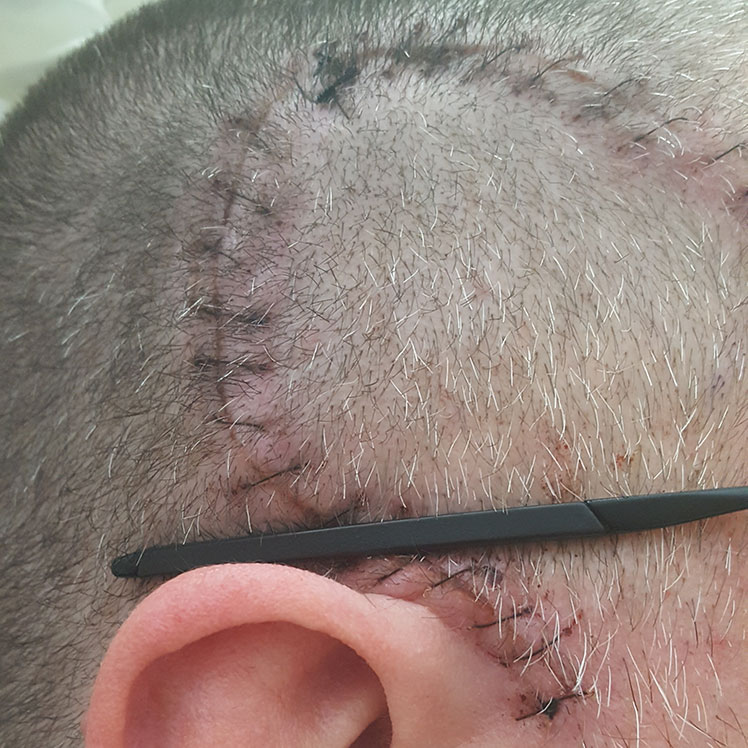
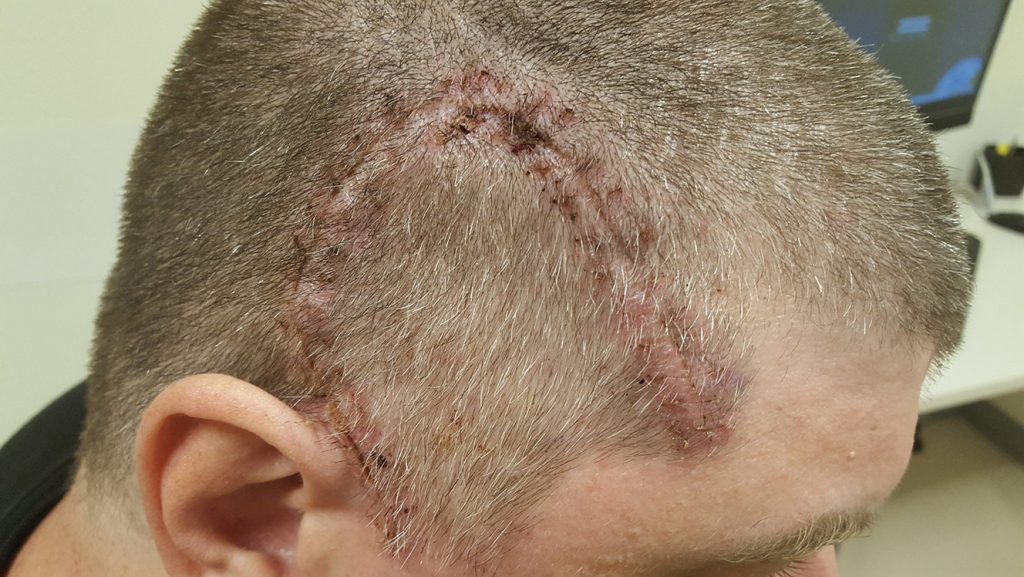
This is a companion gallery to the 020: The Recovery episode. The following images contain GRAPHIC CONTENT of our host’s resection surgery.
After you listen to our 019: The Surgery and 020: The Recovery episodes, and you have questions regarding these images we would love to hear from you. You can reach out to us at social@brainablaze.com or via Twitter @BrainAblaze.
)